
Use Purview DLP Simulation Mode to
Understand PII Risks

Tom Papahronis
CIO Advisor
In most organizations, the end of the year is a unique time. People are scrambling to balance taking time off, finishing projects, enrolling in the new year’s benefit plans, preparing for tax reporting, and performing year-end administrative tasks. Many of these events involve sharing or processing more employee and customer PII (Personally Identifiable Information) data than usual.
If you are thinking about ramping up data loss prevention or other data governance efforts this year, then now is an ideal time to begin spending a few minutes setting up some data loss prevention auditing to see just how much sensitive data is being emailed or shared over the next month or two. This process is invisible to employees but can provide great insights on how PII is used in the organization.
This article shows how to use Purview’s DLP templates and Simulation Mode to simulate what DLP would do if it were in place today. The insight gained from this exercise will go a long way in showing you how PII data is being used, shared, and how this use can be monitored. Demonstrated below are solutions available to you through your Office 365 E3/E5, A3/A5, G3/G5, or Business Premium subscription.
Step One: Set Up a DLP Policy to Detect and Act on Confidential PII Data.
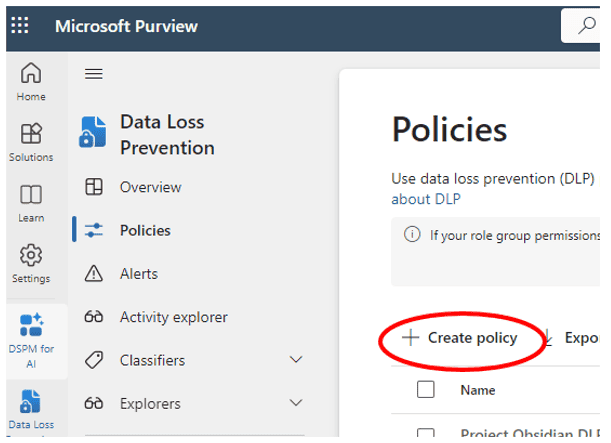
Open the Microsoft Purview portal at https://purview.microsoft.com and navigate to Solutions, then Data Loss Prevention. Click the Policies menu, then Create Policy:
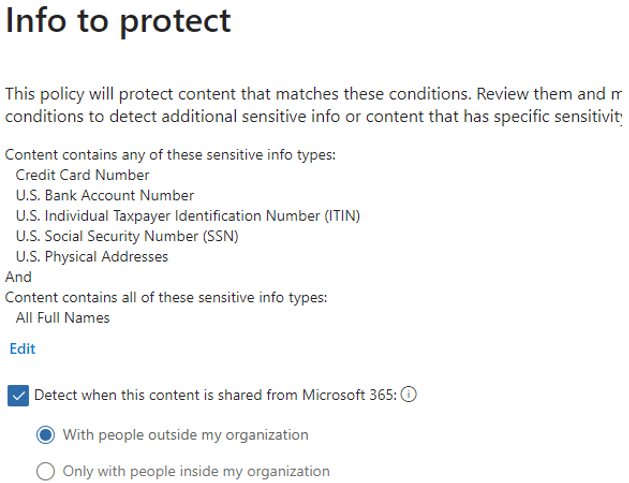
To detect common PII data types, use the enhanced policy template called, “U.S. State Breach Notification Laws Enhanced.”

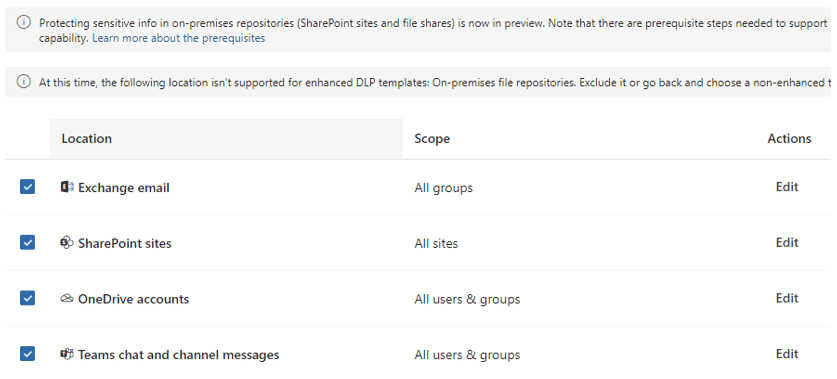
Name your new policy and click Next until you see the screen that allows you to select which Microsoft 365 services will be monitored by the policy. In this case, I chose the following so that we can get a broad sense of where PII data is being used and shared across the company:
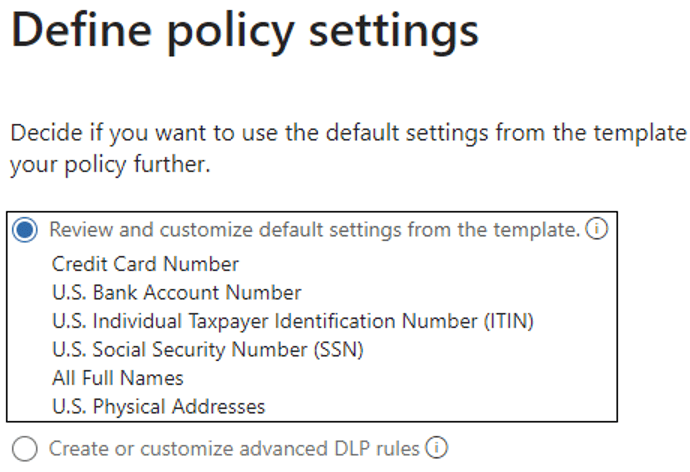
Common PII data types are already included in the template, so let’s stay with the defaults:
Focus analysis on only data shared outside of the organization. Internal data can also be monitored with DLP, but external data sharing is typically the most concerning:
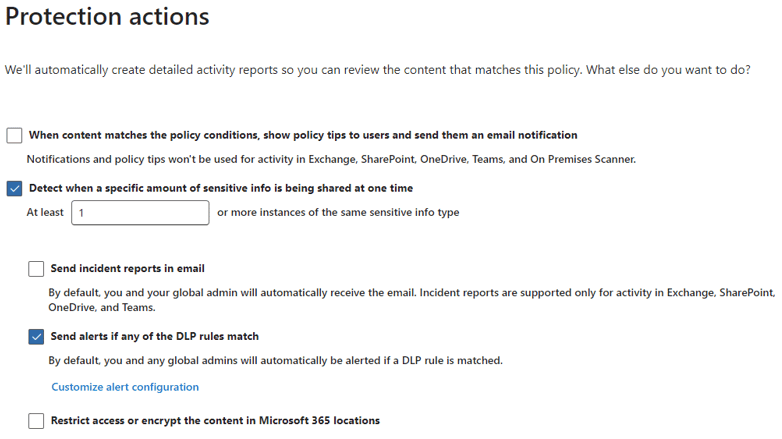
Configure the Protection actions as shown below. Since we are only running this in simulation, you can uncheck anything that would send an email or otherwise notify users. You can also reduce the detection threshold to one instance so all sharing is captured in the analysis:
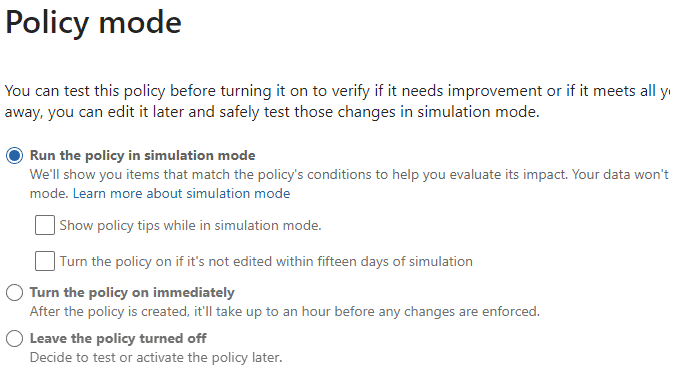
Click Next until you get to the Policy Mode screen and select “Run the policy in simulation mode” so that the policy gathers logs and metrics, but performs no actions:
Submit the policy. It will take effect in an hour or two and start gathering data.
Step Two: Review the Results of the Simulation After a Week.
While the simulation will run for 30 days, check the results to see what the analysis has found so far. The simulation provides overview metrics, a listing of items that triggered the DLP policy, and the alerts that would have been generated if the policy were in production.
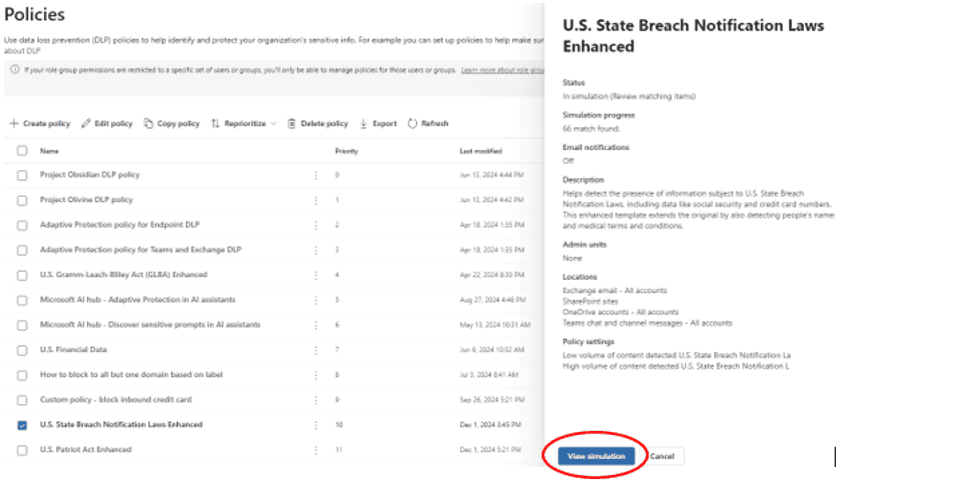
Select the DLP policy from the list and click “View simulation:”
The Simulation overview shows the items detected in each Microsoft 365 service:
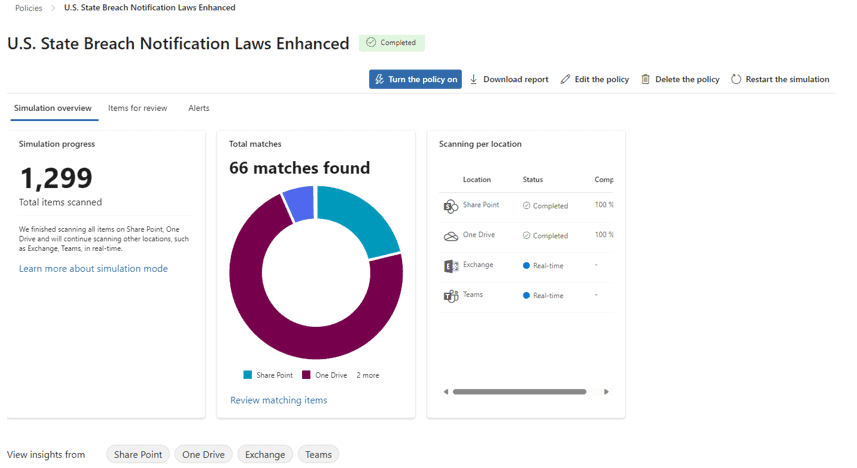
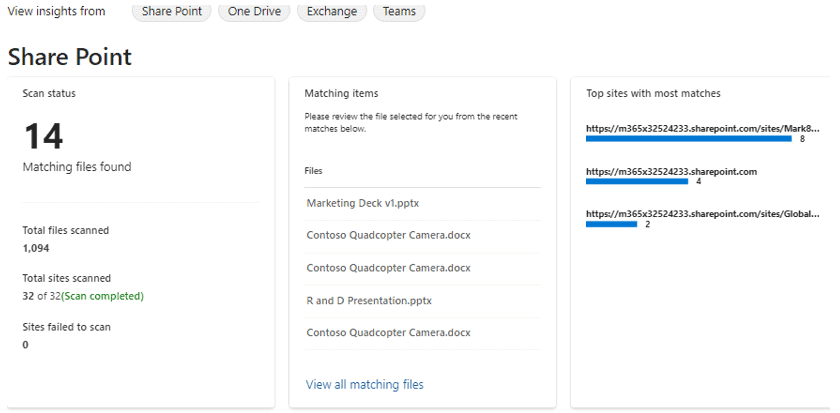
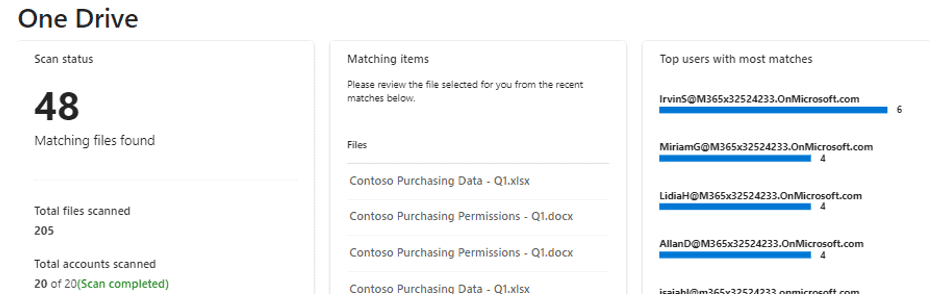
You can also scroll down to see details on what items were detected in each location:
The Items for review shows a consolidated list of all items detected by the policy, and selecting an item shows the detail. Be sure to click through the other links on this page to explore what other data is available:

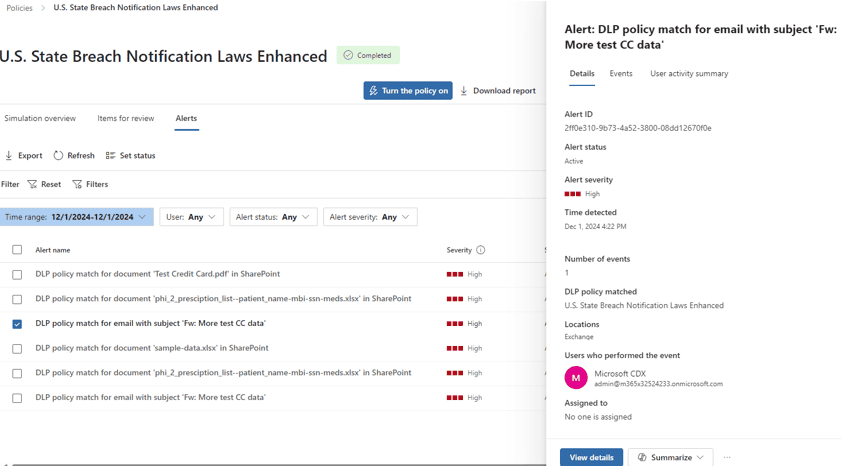
The Alerts menu shows what DLP alerts would have been generated and their detailed information. Again, make sure to click through the links on this page to explore how to drill down into the alerts and get more detailed information, such as the data that was detected, the email recipient, other alerts for this user, etc.:
Step Three: Review Findings and Complete Your Analysis.
Simulations end after 30 days, and the simulation data will be available for another 30 days after that, so be sure to review the results before the expiration. (You can re-run the simulation if needed.)
As you look through the data collected, consider the types of information detected, the amount, and what groups or people are sharing it. This should start to provide insight as to how people are using (or misusing) data so that you can start to develop a plan to address any risks identified and engage with different business units to learn more about their use and sharing of confidential data.
If a written, acceptable-use policy exists that defines the way that people are allowed to share sensitive data, you should be able to see whether people are adhering to it based on the data from the simulation. If no policy exists, you can use the simulation results as a basis to start determining what a policy should include so that DLP policies can help enforce the written policy in the future. Purview controls like data labeling, tooltips, or email encryption can be configured to help limit any identified risks.
DLP simulations are a risk-free way to get visibility into data usage. Consider setting up other simulations with more data types and templates to get a better understanding both of Purview and how data is used in your organization.
We Can Help!
Have questions about the topics in this article? Reach out to our team at info@eGroup-us.com, or complete the form below.
Need Assistance with Purview or DLP?
Contact our team today to get help with any of the updates mentioned above!
